It is possible to redirect calls from the virtual number you have purchased to any softphone app of your preference. Zoiper is among the most favored apps, which offers several advantages such as a straightforward interface, a free version with ample features to begin with, and a user-friendly setup process that lets you start within a minute after installation.
You can make and receive calls with Zoiper. The program works similar to Skype, so the only condition for smooth work is a stable Internet connection.
If you want to configure Zoiper on your computer, please do the following:
- In your personal account, purchase a virtual voice number of the country you are interested in, and then request a SIP account in the “SIP SETTINGS” section.
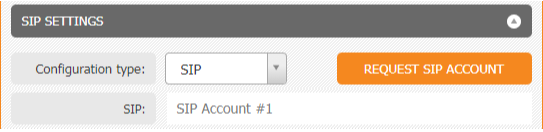
After some time, the credentials of the SIP account will appear in this section. Using this data, it is possible to log in to various SIP phones (softphones). - Download and install the latest version of Zoiper using this link.
- Run the program. Firstly, the proposition to pay for services will appear. The free version of the program contains basic features that will allow you to make and receive calls, to have access to call history and contact list, etc.
To continue using Zoiper as a free user, click on “Continue as a free user” at the bottom of the window.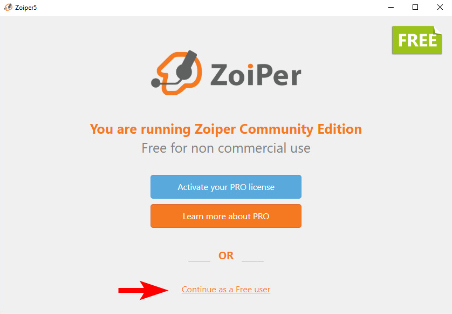
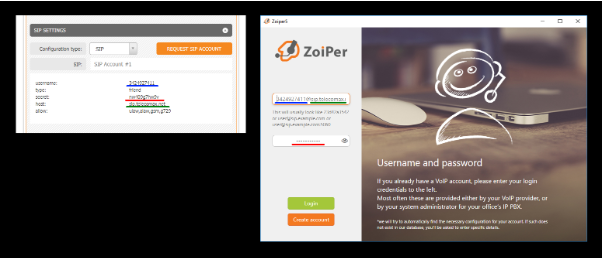
You can always use the paid version of Zoiper if you need to expand the softphone’s functionality. The full list of features of the paid version can be checked with the developers of Zoiper. - You can log in to the softphone with the data that is provided in your personal account on the website:
— the “username/login” Zoiper field should be done as username@host. These data can be found in your personal account in “SIP SETTINGS”;
— the password field (password for authorization) is the same as the “secret” data in your personal account.
Please, be attentive and avoid unnecessary spaces when you authorize. Check if the data you have entered is correct.
Click on “Login” after all the data is set.
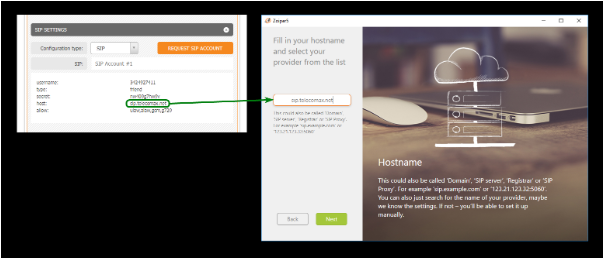
- Fill in the “Hostname” field. Set it as 'sip.telecomax.net', then click “Next”.
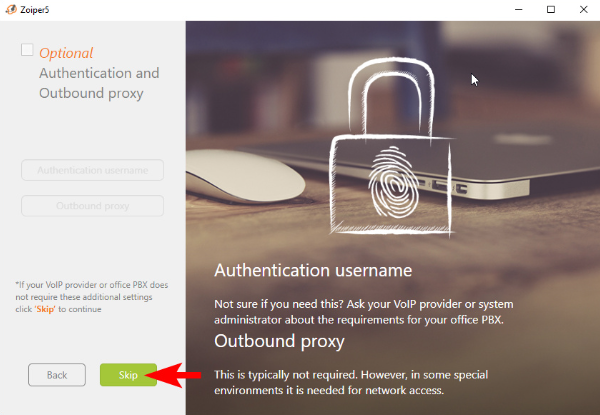
- You can skip the proxy settings.
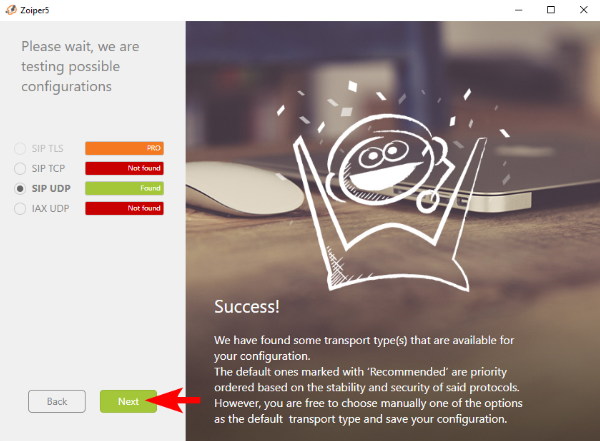
- Next, the Zoiper app will look for SIP configurations that are available to your account. Wait for confirmation of 'SIP UDP' configuration (the line will be highlighted green and will be defined as “found”).
If authentication is successful, press “Next”.
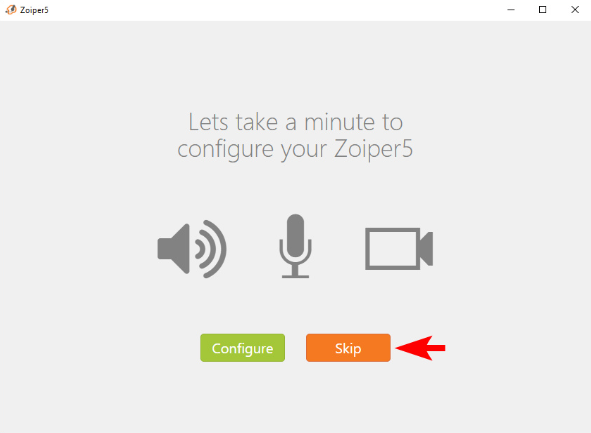
- You can also skip voice and video settings.
- Click “Finish”, and the softphone should be successfully set.

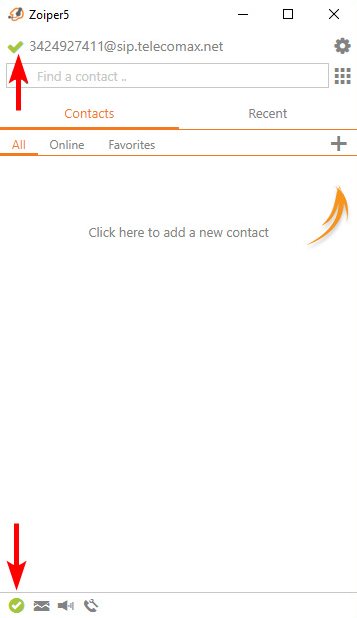
How to understand that your account is ready?
If the configuration of the SIP client and activation of Zoiper are correct, you will notice two green ticks in the app, one in the upper left and the other in the lower left corners.